How to Charge Your 4 Wheeler Battery for Optimal Performance
Charging a 4 wheeler battery is essential for maintaining your vehicle’s performance and longevity. Many drivers find themselves needing to recharge their batteries, whether due to inactivity or other issues. Understanding how to do this safely and effectively can save you time and money.
To charge a 4 wheeler battery, you will need a battery charger, proper safety gear, and knowledge of your vehicle’s electrical system. Follow the manufacturer’s instructions and ensure connections are secure to prevent accidents.
Choosing the Right Charger
Selecting the appropriate charger for your 4 wheeler battery is crucial for maintaining its health and ensuring efficient charging. Different batteries require specific chargers, and using the wrong type can lead to damage or inefficiency. Here are key considerations to guide your choice:
- Battery Type: Identify whether your vehicle uses a lead-acid, AGM, or lithium battery. Each type has distinct charging requirements.
- Charger Compatibility: Ensure the charger is compatible with your battery type. Some chargers are versatile, while others are designed for specific types.
- Charging Amperage: Look for a charger with an appropriate amperage rating. A lower amperage is safer for maintaining battery health, while a higher amperage will charge faster.
- Smart Features: Consider chargers with smart technology that automatically adjust the charging process based on battery needs. This can prevent overcharging and extend battery life.
- Portability: If you plan to charge your battery away from home, opt for a lightweight and portable charger.
By evaluating these factors, you can confidently select a charger that will help maintain your 4 wheeler battery’s performance and longevity.
Preparing Your Battery for Charging
Before charging your 4 wheeler battery, ensure safety and optimal conditions. Taking the right precautions can prevent accidents and enhance the charging process. Follow these steps to prepare effectively:
- Inspect the Battery: Check for any visible damage, leaks, or corrosion on the terminals. If there are signs of damage, consider replacing the battery instead of charging it.
- Wear Protective Gear: Use safety glasses and gloves to protect yourself from acid splashes or any potential sparks while handling the battery.
- Work in a Ventilated Area: Ensure the workspace is well-ventilated to avoid inhaling any harmful gases that may be emitted during the charging process.
- Disconnect the Battery: If your battery is still connected to the vehicle, disconnect it before charging. This prevents any electrical issues and ensures a safe charging environment.
- Check the Charger Settings: Make sure the charger is set to the correct voltage and amperage for your battery type. Refer to the battery’s specifications for guidance.
Following these steps will help you prepare your battery for charging properly, ensuring both safety and efficiency in the process.
Connecting the Charger Properly
Connecting the charger to the battery terminals correctly is crucial for safe and effective charging. A proper connection ensures that the battery receives the correct voltage and prevents potential damage. Follow these steps to connect the charger safely.
Start by identifying the positive and negative terminals on the battery. The positive terminal is usually marked with a “+” symbol and may be colored red, while the negative terminal is marked with a “-” symbol and is typically black. Connect the charger’s red (positive) lead to the positive terminal of the battery first. This step is essential as it helps prevent sparks when you connect the charger.
Next, attach the black (negative) lead to a clean, unpainted metal surface on the vehicle or the negative terminal of the battery if necessary. This minimizes the risk of sparks near the battery. Ensure all connections are secure and that the charger is set to the correct voltage and amperage settings for your specific battery type. Once everything is connected, you can plug in the charger to an electrical outlet and switch it on.
Charging Time Estimates
Understanding how long to charge different types of batteries can significantly enhance their performance and longevity. Charging time varies based on battery type, capacity, and the charger used. Here are some general estimates for charging a 4 wheeler battery:
- Standard Lead-Acid Battery: Typically takes about 4 to 8 hours to fully charge with a standard charger.
- Maintenance-Free Battery: Similar to lead-acid, it usually requires around 6 to 8 hours for a complete charge. Ensure the charger is appropriate for this type.
- AGM (Absorbent Glass Mat) Battery: Charging times can vary but expect around 4 to 6 hours. An AGM charger can optimize the process.
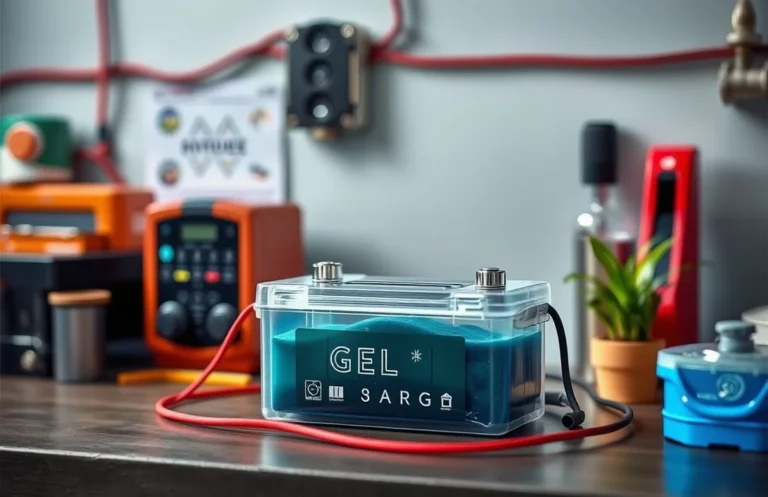
- Gel Battery: Similar to AGM, it generally takes about 4 to 6 hours. A dedicated gel battery charger is recommended to prevent damage.
- Lithium-Ion Battery: Charging can take anywhere from 2 to 4 hours, depending on the charger and battery size. Fast chargers can reduce this time significantly.
Always refer to the manufacturer’s specifications for the most accurate charging time for your specific battery type.
Monitoring the Charging Process
Keeping an eye on the charging process is crucial to ensure optimal performance and safety. By monitoring the battery’s condition during charging, you can detect any potential issues early and prevent damage. Here are steps to effectively monitor the charging process:
- Check the Charger Indicator: Most chargers have indicators that show the charging status. A solid light usually indicates charging, while a blinking light may signal an issue.
- Monitor Temperature: Feel the battery and charger periodically. If either becomes excessively hot, disconnect the charger immediately to prevent overheating.
- Listen for Unusual Noises: Pay attention to any hissing or popping sounds during charging. These noises can indicate gas buildup or internal damage.
- Inspect Connections: Look for any signs of corrosion or loose connections at the terminals. Clean or tighten as necessary to ensure a good connection.
- Use a Multimeter: If you have one, test the voltage at the battery terminals periodically to ensure it is charging correctly. This helps confirm that the charger is functioning properly.
By following these steps, you can ensure that the charging process proceeds smoothly and safely, allowing your battery to perform optimally.
Disconnecting the Charger Safely
Once the charging process is complete, disconnecting the charger safely is essential to prevent damage to the battery or the charger itself. Follow these steps to ensure a proper disconnection:
- Turn off the charger: Before removing any cables, make sure to switch off the charger to eliminate any risk of electrical shock or short circuit.
- Remove the negative cable first: Always disconnect the negative (-) cable from the battery terminal first. This helps prevent any accidental sparks that could occur if the positive cable is removed first.
- Follow with the positive cable: After the negative cable is safely detached, proceed to remove the positive (+) cable from the battery terminal.
- Store the charger properly: Once disconnected, store the charger in a dry and cool place, ensuring that the cables are untangled and secured.
- Check the battery: Take a moment to inspect the battery terminals for any corrosion or damage before closing the hood.
By following these steps, you can safely disconnect the charger and maintain the integrity of your vehicle’s battery system.
Maintaining Battery Health Post-Charge
After charging, proper care of your vehicle’s battery significantly enhances its lifespan and performance. Implementing good practices can prevent premature wear and ensure reliability on the road. Here’s how to maintain battery health effectively after charging:
- Regular Inspections: Check the battery terminals and connectors for corrosion or loose connections regularly. Clean any corrosion with a mixture of baking soda and water, and ensure connections are tight.
- Monitor Battery Fluid Levels: For non-sealed batteries, inspect electrolyte levels and top up with distilled water as necessary. This helps maintain battery efficiency.
- Keep It Charged: Avoid letting the battery remain discharged for extended periods. Frequent short trips can deplete the battery without allowing it to recharge fully, so ensure regular longer drives.
- Store Properly: If you need to store your vehicle for a while, disconnect the battery and store it in a cool, dry place. Consider using a trickle charger to keep it topped up during storage.
- Temperature Control: Extreme temperatures can affect battery performance. Whenever possible, park in shaded areas or garages to mitigate temperature extremes.
By following these steps, you can ensure your battery remains in optimal condition, ready for reliable performance whenever you need it.
Quick Summary
- Ensure the battery is disconnected from the vehicle before charging.
- Select the appropriate charger based on the battery type (lead-acid, AGM, etc.).
- Follow the manufacturer’s instructions for charging voltage and current settings.
- Monitor the charging process to prevent overcharging, which can damage the battery.
- Check for any signs of damage or leakage before and after charging the battery.
- Allow the battery to cool down after charging before reconnecting it to the vehicle.
- Regularly maintain and inspect the battery to extend its lifespan and performance.
Frequently Asked Questions
How do I know if my 4 wheeler battery needs charging?
If your vehicle is slow to start, the headlights appear dim, or electronic accessories are not functioning properly, it may indicate a weak battery that requires charging. Additionally, if the battery is more than three years old, it’s a good idea to have it tested regularly.
What equipment do I need to charge a 4 wheeler battery?
To charge your 4 wheeler battery, you’ll need a battery charger suitable for your battery type (lead-acid, AGM, etc.), safety goggles, and gloves for protection. Make sure to have a set of jumper cables handy if you’re jump-starting from another vehicle.
Can I charge my battery while it’s still in the vehicle?
Yes, you can charge your battery while it’s installed in the vehicle, but it’s essential to ensure that all electronic accessories are turned off. For safety, remove the negative terminal first before connecting the charger, and follow the charger’s instructions carefully.
How long does it take to charge a 4 wheeler battery?
The charging time can vary based on the battery’s size and condition, as well as the charger’s output. Generally, it can take anywhere from a few hours to overnight for a standard charger, while a fast charger may reduce this time significantly.
What should I do after charging my 4 wheeler battery?
After charging, ensure to disconnect the charger properly, starting with the negative terminal. Check the battery for any signs of damage, and consider testing it to confirm it’s holding a charge before reinstalling it in the vehicle.

- How to Jump-Start a Motorcycle with a Car Battery Safely - February 22, 2026
- Does Life360 Really Drain Your Battery? What You Should Know - February 22, 2026
- Do Hardwired Smoke Detectors Need Batteries for Backup Support? - February 22, 2026