How to Replace the Battery on Your Can-Am Spyder Vehicle
Replacing the battery on your Can-Am Spyder is essential for maintaining peak performance. Understanding how to do this properly not only ensures your ride runs smoothly but also saves you time and money on repairs. Let’s simplify the process so you can handle it with confidence.
This guide will provide you with step-by-step instructions for battery replacement, highlight essential tools needed, and emphasize safety precautions to prevent damage to your vehicle. With clear guidance, you’ll feel ready to tackle this maintenance task.
Identifying Battery Type
To successfully replace the battery in your Can-Am Spyder, you need to determine the correct battery type for your model. This ensures compatibility and optimal performance. Follow these steps to identify the right battery:
- Check your owner’s manual: Locate the section that specifies battery specifications, including type and dimensions.
- Look for a label on the existing battery: If you can access the current battery, examine it for a label that indicates its type and specifications. Common types for the Spyder include AGM (Absorbent Glass Mat) or conventional lead-acid batteries.
- Visit the manufacturer’s website: Can-Am’s official site provides detailed specifications for each model, which can help you confirm the battery type needed.
- Consult with a local dealer or mechanic: If you’re unsure or have trouble finding the information, a certified dealer can provide guidance on the correct battery for your specific Spyder model.
Identifying the battery type correctly is essential for the can am spyder battery replacement process to go smoothly and safely.
Gathering Necessary Tools
Before you begin the battery replacement process on your Can-Am Spyder, it’s essential to gather the necessary tools. Having the right equipment on hand will streamline the task and help ensure a successful replacement. Below is a list of items you will typically need to complete this maintenance task.
- Socket Set: A basic socket set, including metric sizes, will be required for removing the battery terminals and securing the battery in place.
- Wrench: An adjustable wrench or a combination wrench for any bolts that may be used in your specific model.
- Screwdriver Set: A set of screwdrivers, both flathead and Phillips, may be necessary depending on your Spyder’s battery cover.
- Gloves: A pair of rubber or latex gloves to protect your hands from battery acid and ensure a good grip.
- Safety Glasses: Always wear safety glasses to protect your eyes from any potential splashes.
- Multimeter: This tool will help you check the voltage of the new battery and ensure it’s functioning properly.
Having these tools ready will make the battery replacement process smoother and more efficient, reducing the risk of error or damage.
Safety Precautions to Follow
Before you start the battery replacement process on your Can-Am Spyder, take a moment to prioritize safety. Working with a motorcycle battery involves handling electrical components, so it’s crucial to follow specific precautions to prevent accidents or injuries.
Always wear safety goggles and gloves during the procedure. These protect your eyes from any potential acid splashes and your hands from sharp edges or battery terminals. Ensure the Spyder is parked on a flat, stable surface, and turn off the ignition. Disconnecting the battery while the vehicle is running can lead to electrical shorts or damage to the electrical system.
Additionally, be cautious of the battery’s weight. Batteries can be heavy, so it’s advisable to have a friend assist you if you’re unsure about lifting it safely. Lastly, ensure that you have a proper disposal method for the old battery, as it contains harmful materials that should not be discarded improperly.
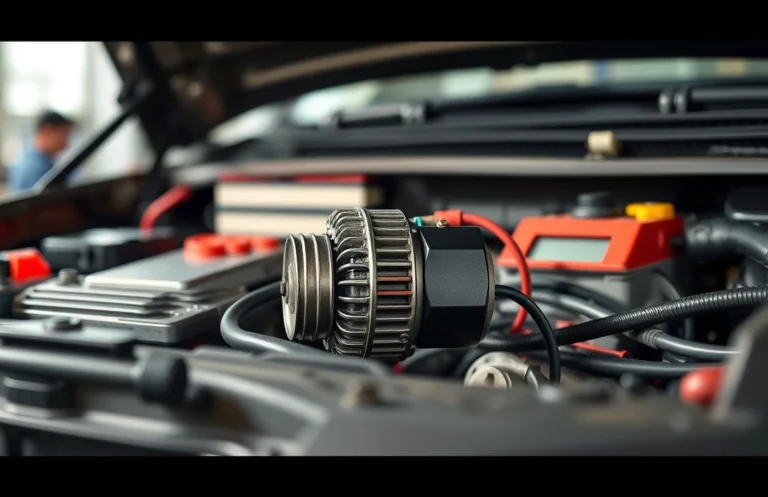
Removing the Old Battery
Now that you’ve taken the necessary safety precautions, it’s time to remove the old battery from your Can-Am Spyder. This process is straightforward, but it’s essential to follow each step carefully to avoid any damage to the vehicle. Here’s how to do it:
- Locate the battery compartment: Usually found under the seat or a side panel. Consult your owner’s manual if you’re unsure.
- Disconnect the negative terminal: Using a wrench, loosen the bolt on the negative terminal (often marked with a minus sign). Carefully pull the cable off and secure it away from the battery.
- Disconnect the positive terminal: Repeat the process for the positive terminal (marked with a plus sign). Make sure this cable is also secured away from the battery.
- Remove any securing hardware: If applicable, take out any bolts or clamps that hold the battery in place. Keep these parts in a safe place for reassembly.
- Lift out the old battery: Carefully lift the battery out of the compartment, ensuring you maintain a firm grip. Batteries can be heavy, so use both hands if necessary.
Once the old battery is removed, you’re ready to proceed with installing the new battery, ensuring that your Can-Am Spyder is back in action.
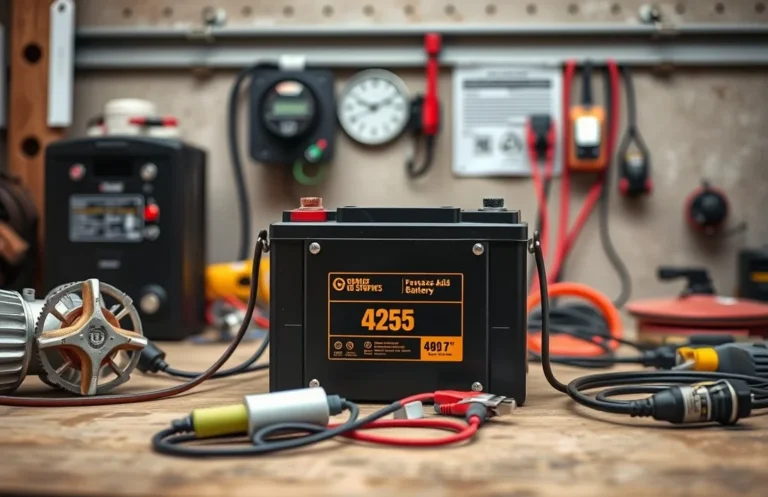
Installing the New Battery
With the old battery removed, it’s time to install the new one securely. Proper installation is crucial for ensuring your Can-Am Spyder operates efficiently and safely. Follow these steps closely to avoid any issues during the process.
Begin by placing the new battery into the battery compartment, ensuring it is oriented correctly—positive terminal on the positive side and negative terminal on the negative side. Secure the battery in place using any bracket or strap that was previously removed. Next, connect the positive terminal first. Slide the cable over the positive terminal and tighten the nut with a wrench until it is snug, but be careful not to overtighten, as this can damage the terminal.
After securing the positive connection, proceed to the negative terminal. Attach the negative cable in the same manner, ensuring a secure fit. Once both terminals are connected, double-check that the connections are tight and the battery is firmly in place. It’s also wise to inspect for any corrosion on the terminals before closing everything up. After confirming everything is secure, you can move on to the next step: disposing of the old battery responsibly.
Disposing of Old Battery
Proper disposal of your old battery is essential to protect the environment and comply with local regulations. Lead-acid batteries, like those used in your Can-Am Spyder, contain hazardous materials and must be recycled correctly. Here’s how to do it responsibly.
Take your old battery to a recycling center or an auto parts store that offers battery recycling services. Most retailers that sell batteries have programs in place to accept used ones. If possible, keep the battery in an upright position to prevent any leaks during transport. Always check for any specific disposal guidelines in your area, as regulations can vary widely. Additionally, many municipalities have hazardous waste collection events where you can safely drop off batteries.
By disposing of the old battery properly, you contribute to environmental sustainability and ensure that harmful materials are handled safely. This final step completes the process of replacing your battery, allowing you to enjoy your Can-Am Spyder with peace of mind.
Quick Summary
- Battery replacement for Can-Am Spyder is essential for maintaining optimal performance.
- Use a high-quality, compatible battery specified for your Spyder model.
- Follow safety precautions, including disconnecting the negative terminal first.
- Regular maintenance and checks can extend battery life and performance.
- Consider professional assistance if unsure about the replacement process.
- Dispose of the old battery properly to comply with environmental regulations.
- Check the battery’s warranty for coverage on replacements or defects.
Frequently Asked Questions
1. How do I know when my Can-Am Spyder battery needs to be replaced?
Signs that your battery may need replacement include slow engine cranking, dim headlights, or the battery warning light appearing on the dashboard. If your Spyder struggles to start or shows any of these symptoms, it’s best to check the battery health.
2. What type of battery does my Can-Am Spyder use?
Most Can-Am Spyder models use a 12V lead-acid battery, typically an AGM (Absorbent Glass Mat) type. Always refer to your owner’s manual for the exact specifications to ensure you purchase the correct replacement battery.
3. Can I replace the battery myself, or should I seek professional help?
While you can replace the battery yourself with basic tools and some caution, it is advisable to consult your owner’s manual for specific instructions. If you’re unsure or uncomfortable, seeking assistance from a professional mechanic is a good option.
4. What tools do I need to replace the battery in my Can-Am Spyder?
You will typically need a socket set, a wrench, and possibly a screwdriver to access the battery compartment. Additionally, safety gloves and goggles are recommended to protect yourself during the process.
5. Are there any safety precautions I should take when replacing the battery?
Yes, always disconnect the negative terminal first to prevent short-circuiting. Ensure the ignition is off and wear protective gear to avoid any accidental contact with battery acid or electrical components during the replacement process.

- How to Jump-Start a Motorcycle with a Car Battery Safely - February 22, 2026
- Does Life360 Really Drain Your Battery? What You Should Know - February 22, 2026
- Do Hardwired Smoke Detectors Need Batteries for Backup Support? - February 22, 2026