Locating the Battery in Your Can-Am Defender: A Step-by-Step Guide
Finding the battery location in your Can-Am Defender is essential for maintaining the vehicle’s performance. Whether you’re preparing for an off-road adventure or just checking up on your ride, knowing where to look can save you time and hassle.
The battery is located under the seat in the Can-Am Defender. To access it, simply lift the seat and you will find the battery compartment. Ensure you follow safety precautions when handling the battery for maintenance or replacement.
Finding the Battery Compartment
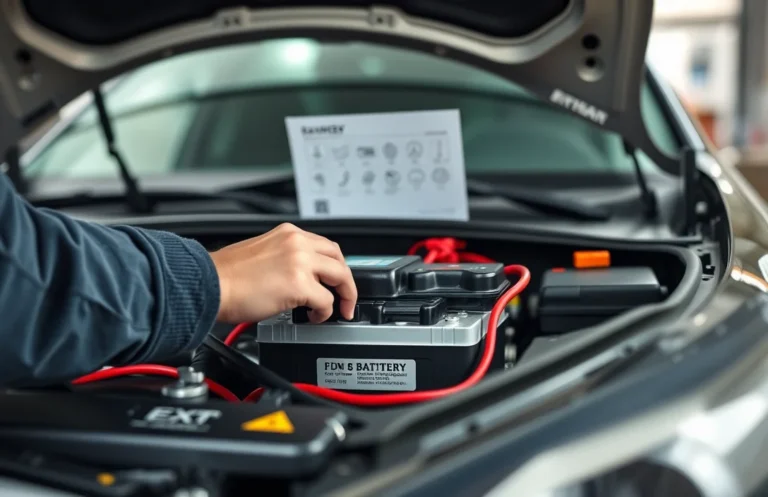
Locating the battery in your Can-Am Defender is crucial for routine maintenance and ensuring optimal performance. The battery compartment is typically situated under the hood, towards the front of the vehicle. You’ll find it positioned near the driver’s side, making it relatively easy to access for checks or replacement.
To confirm its location, open the hood and look for a large, rectangular cover. This cover usually has a secure latch or clips to keep it closed. The battery itself will be directly beneath this cover, connected by cables that provide power to your vehicle. Knowing this general area will help you when you need to perform further maintenance tasks.
Accessing the Battery Cover
With the battery compartment located, the next step is to safely remove the cover. This will allow you to access the battery for maintenance or replacement. Follow these straightforward steps to ensure you do it correctly and without damaging any components.
- Ensure the vehicle is turned off and parked on a flat surface. Engage the parking brake for added safety.
- Locate the fasteners securing the battery cover. These may be screws or clips depending on the model year.
- Using a suitable screwdriver or tool, carefully remove the fasteners. Keep them in a safe place for reinstallation.
- Once all fasteners are removed, gently lift the battery cover off. Be cautious not to pull too hard or force it, as this could damage the cover or surrounding components.
- Set the cover aside in a clean area to avoid dirt or debris getting inside the compartment.
By following these steps, you’ll successfully access the battery compartment of your Can-Am Defender, setting the stage for the next maintenance task.
Identifying the Battery Model
To ensure you can maintain or replace the battery effectively, it’s crucial to identify the specific battery model used in your Can-Am Defender. This information is essential for purchasing the correct battery or compatible accessories.
Start by consulting your owner’s manual, which typically includes details on the battery specifications. Look for the section labeled “Specifications” or “Battery Information.” If you don’t have the manual handy, you can also check the manufacturer’s website or contact a local dealership to get the exact model number.
Once you have the model number, you can easily find replacement options or accessories specifically designed for your Defender. Knowing the battery model can also help you understand its capacity and performance characteristics, ensuring that your off-road vehicle runs smoothly for years to come.
Checking Battery Connections
Inspecting the battery connections is essential for maintaining the performance of your Can-Am Defender. Loose or corroded connections can lead to starting issues and decreased electrical performance. Begin by ensuring that the vehicle is turned off and in a safe location.
Locate the battery terminals, typically found at the front of the vehicle under the seat or hood. Check both the positive (+) and negative (-) terminals for any signs of corrosion, which appears as a white, powdery substance. If you notice corrosion, it’s advisable to clean the terminals with a mixture of baking soda and water, using a wire brush. Make sure to disconnect the negative terminal first before cleaning, then reconnect it last.
Next, ensure that the connections are tight. Use a wrench to tighten any loose bolts, but be careful not to overtighten, as this can damage the battery terminals. Finally, visually inspect the wiring for any signs of wear or damage. A secure and clean connection is key to ensuring your battery operates efficiently, setting the stage for the next steps in battery maintenance.
Removing the Battery Safely
Now that you’ve confirmed your battery connections, it’s time to safely remove the battery from your Can-Am Defender. Following these steps will help ensure you do this without any mishaps. Always remember to prioritize safety and wear gloves and eye protection throughout the process.
- Disconnect the Negative Terminal: Start by using a wrench to loosen the bolt on the negative terminal (typically marked with a minus sign). Carefully remove the cable and tuck it away to avoid accidental contact.
- Disconnect the Positive Terminal: Next, loosen the bolt on the positive terminal (marked with a plus sign) and remove the cable. Ensure it is secured away from the battery.
- Remove Battery Hold-Downs: Depending on your model, there may be a hold-down bracket or strap securing the battery. Use the appropriate tools to remove these components.
- Lift Out the Battery: With the terminals disconnected and hold-downs removed, carefully lift the battery out of its compartment. Be cautious, as batteries can be heavy.
Once removed, set the battery aside in a safe location for maintenance or replacement. Always handle batteries with care, as they contain corrosive materials.
Replacing the Battery
Installing a new battery in your Can-Am Defender is straightforward and crucial for maintaining optimal performance. Follow these steps to ensure a proper installation, keeping everything secure and functional.
- Position the New Battery: Place the new battery in the designated compartment, ensuring the terminals are accessible. The positive terminal should be on the left side, and the negative on the right.
- Connect the Positive Terminal: Start by attaching the positive cable (usually red) to the positive terminal of the battery. Tighten the connection securely to avoid any potential issues.
- Connect the Negative Terminal: Next, connect the negative cable (typically black) to the negative terminal. Again, ensure this connection is tight and secure.
- Check for Stability: Gently shake the battery to confirm it is stable and doesn’t move. A secure fit is essential to avoid vibrations that can lead to disconnects.
- Reconnect Any Removed Components: If you had to remove any components to access the battery, reinstall them now, making sure everything is back in its original position.
- Test the Installation: Turn on the ignition to test if the battery is functioning correctly. If everything operates smoothly, your installation is complete!
Battery Maintenance Tips
Maintaining the battery in your Can-Am Defender is crucial for optimal performance and longevity. Regular checks and proper care can prevent unexpected failures and extend the life of your battery. Follow these best practices to keep your battery in great shape.
Start by inspecting the battery terminals for corrosion or dirt. Clean them with a mixture of baking soda and water, ensuring a good connection. Check the battery’s fluid level if it’s not a sealed type; top it up with distilled water if necessary. Additionally, ensure that the battery is securely mounted to prevent vibrations that could damage it during off-road adventures.
It’s also wise to periodically test the battery’s voltage using a multimeter. A healthy battery should read around 12.6 volts or higher when fully charged. If you notice a drop below this level, consider charging it or replacing it. Finally, if the vehicle will be stored for an extended period, disconnect the battery or use a battery maintainer to prevent discharge.
Quick Summary
- The battery of the Can-Am Defender is located under the driver’s seat.
- Accessing the battery requires removing the seat cushion.
- The battery is secured with a bracket and may have protective covers.
- It is important to disconnect the negative terminal first when servicing the battery.
- The battery type is typically a 12V lead-acid or AGM battery, depending on the model.
- Regular maintenance of the battery terminals can enhance performance and longevity.
- Always refer to the owner’s manual for specific instructions related to your model.
Frequently Asked Questions
Where is the battery located in my Can-Am Defender?
The battery in a Can-Am Defender is typically located under the driver’s side seat. To access it, simply lift the seat cushion, and you will find the battery secured in a compartment beneath.
How can I safely remove the battery from my Can-Am Defender?
To safely remove the battery, first ensure the vehicle is turned off and the keys are removed. Disconnect the negative terminal first, followed by the positive terminal, and then carefully lift the battery out of its compartment.
What type of battery does the Can-Am Defender use?
The Can-Am Defender generally uses a maintenance-free 12V lead-acid battery. It’s important to consult your owner’s manual for the specific model’s battery specifications to ensure compatibility during replacement.
How often should I check my Can-Am Defender’s battery?
It’s a good practice to check your battery at least once a month, especially before and after off-road excursions. Look for signs of corrosion, loose connections, or any unusual swelling that could indicate a need for maintenance or replacement.
Can I jump-start my Can-Am Defender if the battery is dead?
Yes, you can jump-start your Can-Am Defender using jumper cables and another vehicle. Make sure to connect the positive terminals first, followed by the negative, and follow proper jump-starting procedures to avoid damage to the electrical system.